This tutorial shows how you can password protect a PDF file with novaPDF. Password protecting a PDF file helps you ensure that even if the document gets lost the content won't be available to anyone else unless you shared the password with them.
You can password protect a PDF file during conversion with novaPDF Pro. Simply open the document you want converted to a password-protected PDF, then print it to novaPDF and choose to add a pasword during conversion.
With novaPDF Pro you can password-protect PDF files in two ways:
- The easiet method is to change the default printing settings to password-protect a PDF file for the current print job only - this means that everytime you'll want to password-protect a PDF file you'll need to modify the printing settings.
- The second option is to create a printing profile that will password-protect any PDF files that are created with that profile this way, everytime you'll want a PDF protected you just need to select that profile and no other changes will be required.
Password-protect a PDF file with novaPDF Pro using the default settings:
To password protect a PDF file by modifying the default settings:
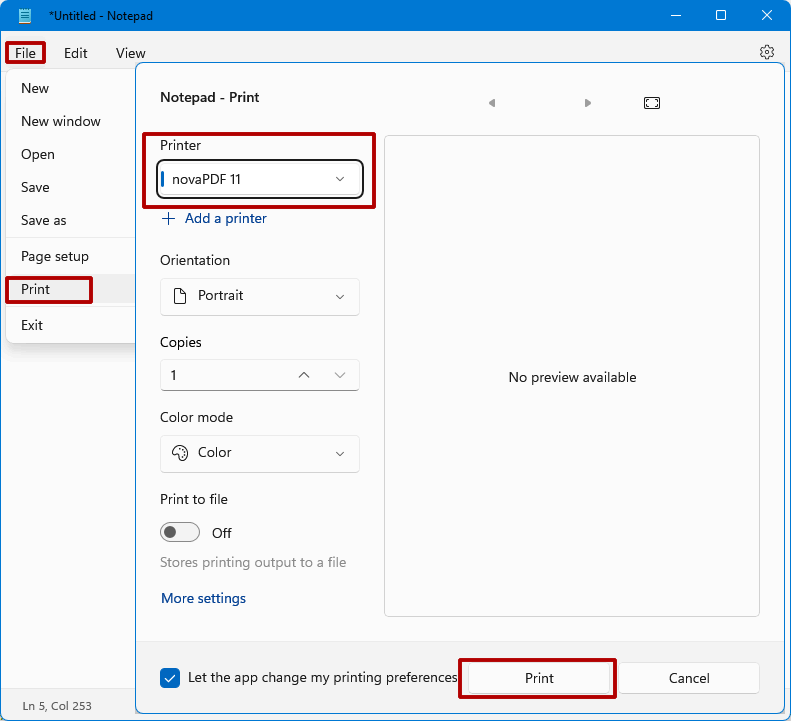
- Open the document that you want to convert to a password protected PDF. Go to File->Print, select novaPDF and click on OK.
![Password protect PDF files - 1 Password protect PDF files - 1]()
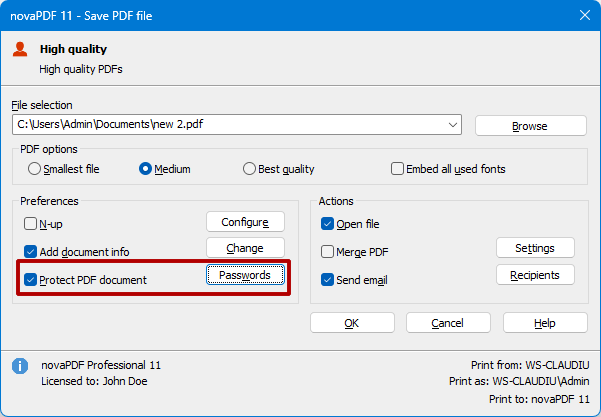
- In the Save PDF file window that shows up, check the Protect PDF document option.
![Password protect PDF files - 2 Password protect PDF files - 2]()
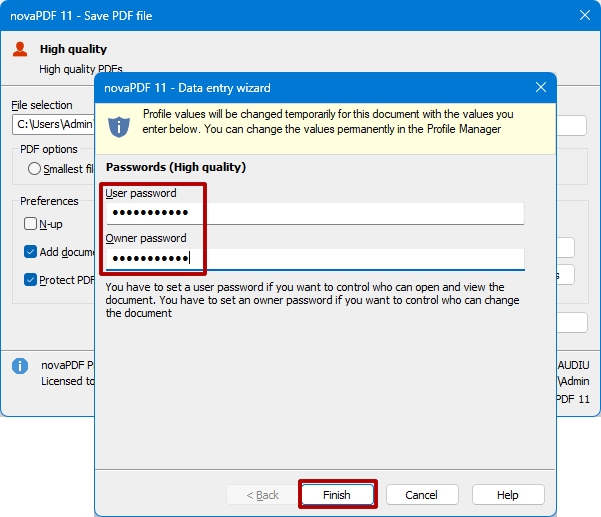
- Click on the Passwords button and enter an User password and/or an Owner password then click on Finish to generate the PDF:
- User password is for opening (and reading) the PDF file. If you define an user password before generating the PDF file, when someone will want to open the resulting PDF file it will have to enter the user password to open it. So only the ones that know this password can read/open the password protected PDF file.
- Owner password is set for changing the rights of the PDF file. The owner password is not requested when opening the PDF file but it is requesting when you want to change something in the password protected PDF file that was restricted from modifying.
![Password protect PDF files - 3 Password protect PDF files - 3]()
The PDF will be opened in the default viewer and for opening it will require the set password. If you want more advanced password protecting features, you'll need to define a printing profile via the Profile Manager.
Creating a printing profile that password-protects documents
These are the steps for creating a printing profile that will send the PDF via e-mail for each current and subsequent printing jobs that use this profile:
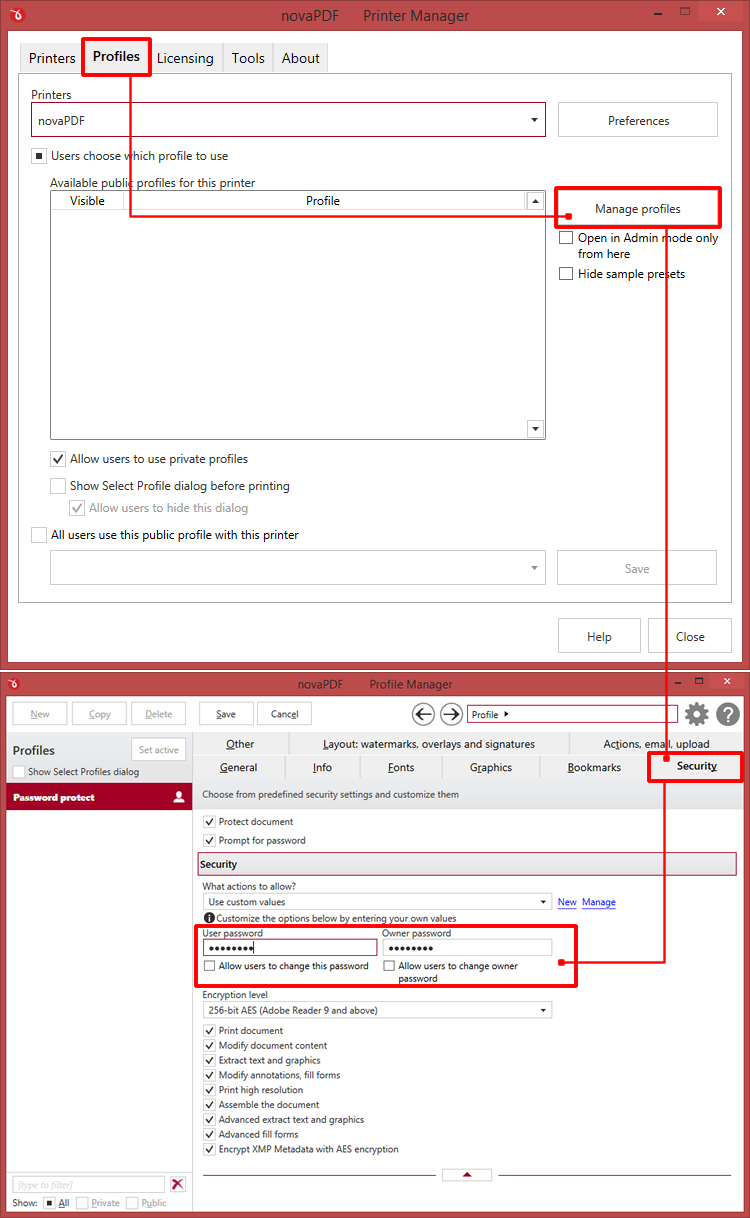
- Open Printer Manager (go to Start and type "novaPDF printer manager" in Windows 8 and above, or go to Start->Programs->novaPDF in Windows 7 or previous) then click on Profiles->Manage Profiles.
- Click on New to create a new profile (if you don't want to edit the current one) and enter a Name/Description for it in the General section
- Go to the Security tab and check the option Protect document. By default novaPDF is set to Allow everything meaning if the recipient of the PDF has the password he will be able to read, edit, copy, print and so on. You can choose a more restrictive level under Security by choosing from the drop-down to Allow Changes only, Allow Copying or Allow Printing. You can also click on New to define your own security preset.
- You can setup a password for opening and/or modifying the PDF document by entering it in the User Password field (Owner Password lets you require a password when changing the security features of the PDF, not when opening it).
- Select the Encryption Level method depending on the protection level desired.
- Optionally adjust the other settings (Print document, Modify document content) that were set by the Security profile you chose. If you start modifying those, the security profile will be set to Custom. If an option is checked, it means that the user with the password will be able to do that action to the PDF file - if it's unchecked even if the password is entered the action won't work.
- Click on the Save button to save this printing profile. The new profile will be available for other print jobs as well and if you define new ones you can switch between them from the Printing Preferences window.

Examples of using High Level Encryption to restrict PDF permissions:
- If you want to disallow content copying from the PDF, you should make sure that the Extract text and Graphics and Advanced extract text and graphics options are unchecked. If these options are unchecked, when someone will try to copy text from the PDF to paste it elsewhere, it will not work.
- If you want to disallow readers to print the password protected PDF document, you can do so by unchecking the Print Document option in the Document Permissions section. Additionally, you can allow printing only in low resolution (150 dpi), by checking the Print Document option but unchecking the Print high resolution one (allowing only low resolution printing also prevents users from using optical character recognition software to create a similar document).
- If you want to disallow form filling, make sure the following options are unchecked: Modify Annotations, fill forms and Advanced form filling.
You can restrict basic access so that the user opening the password protected PDF will not be able to: Print document, Modify document content, Extract text and graphics, Modify annotations, Fill forms. Optionally you can restrict access so that the user opening the password protected PDF will not be able to Print high resolution, Assemble the document, Advanced extract text and graphics, Advanced fill forms.
Note that when using any of the two types of encryption that novaPDF supports, the resulting PDF files will have their contents encrypted (even if you don't set a password, but only select an encryption option) so search engines won't be able to index the contents of the PDF files (nor their metadata description). You can check to see if your PDF has the content encrypted in Adobe Reader, by pressing Ctrl+D and clicking on the Security tab. If the content is encrypted, you should see the following text under the Document Security section: All contents of the document are encrypted and search engines cannot access the document's metadata.


